
MS Project (Microsoft Project Management) is a very useful tool for project managers since it allows them to create a schedule, allocate resources to tasks, track progress, manage budgets, and assess workloads for an ongoing project.
This article explains the software program’s different functions with examples for simple comprehension. Follow these steps to use Microsoft Project for project management:
Steps to use Microsoft Project for Project Management
1. Setup
After you’ve downloaded and installed Microsoft Project on your computer, you may begin putting information into the task plan of the Gantt chart. Including the task name and length.
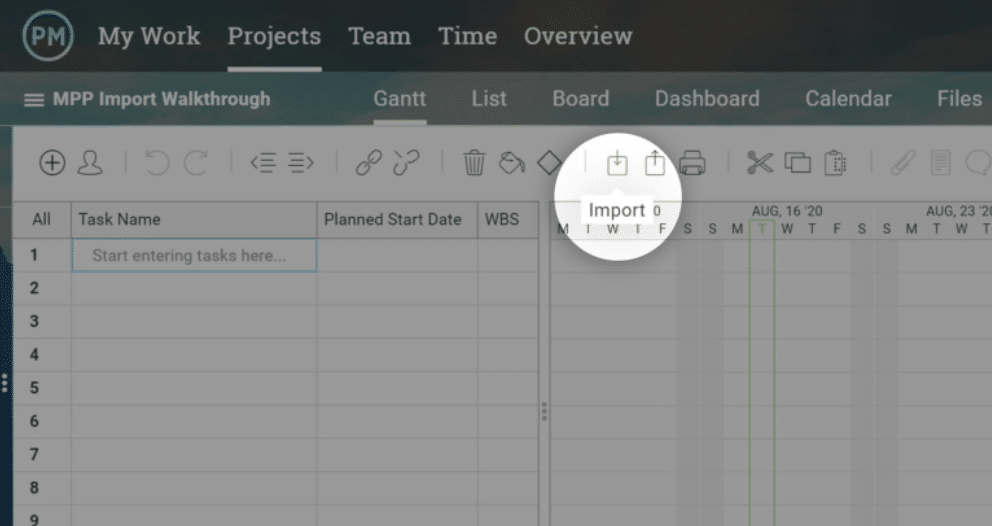
2. Import project
Begin by choosing the Gantt project view. You’ll notice an import button in the shape of a box with an arrow through it there. Simply click it.
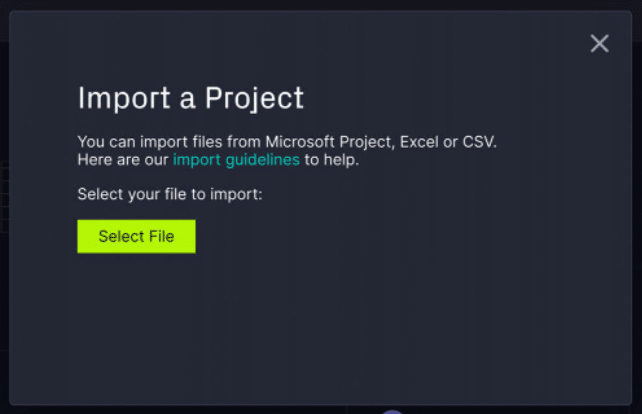
Now, select the file you want to import and click next.
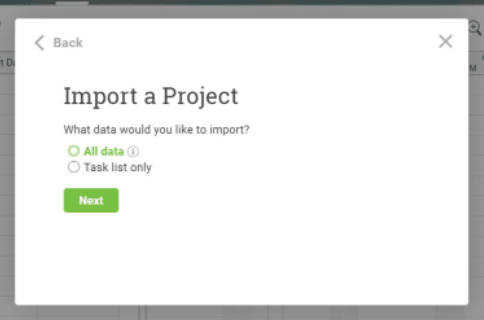
You may need to use the new popup window to identify the import choices.
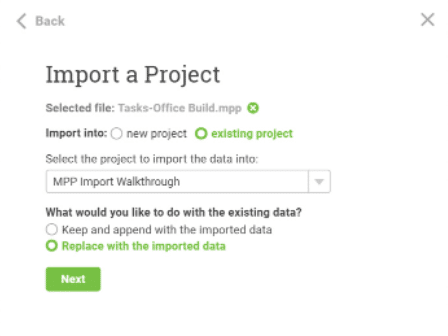
Such as if you wish to import the MPP file into a new or existing project.
Then determine if the data should be kept or replaced.
Choose whether to import all of the data or only the tasks. After you’ve selected, click next.
You have choices between appending and replacing.
3. Main screen
A screen will appear in front of you showing the Gantt chart and all the settings that you make to your project.
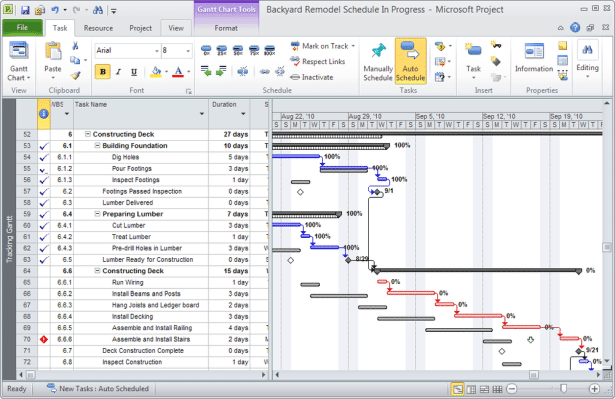
The toolbar option is found in the view menu, where you may choose between Gantt charts, timelines, network diagrams, task usage, and tracking, among other options.
You may now choose the best view for you.
You’re ready to roll
All is set up here. You may modify the settings during the project execution.
Start modifying and sharing your MPP file.
You’ll note that we save your customizations, and any changes you make will be carried over to MS Project when you export the file.
Advance Setting of the Project
- Keep in mind to save the project.
- Give your project a name while saving it in a folder.
- MS Project starts all of your tasks on the same day by default.
- Click on a job to turn it into a milestone. Right-click it after it’s highlighted to open the task information window.
- Choose the Advanced tab from the drop-down menu.
- Locate the checkbox at the bottom-left.
- All you have to do now is tick this box, and the assignment will become a milestone. It will appear as a black diamond shape on your Gantt chart.
You may also find milestones in scheduling approaches like the Critical Path Method and project management tools. Like in the case of Gantt, charts can be used to establish significant scheduling periods.
Perks of Choosing MS Project
- Microsoft Project, like ProjectManager, provides project managers and teams with numerous views.
- However, its platform is not as collaborative. Grid View, Board View, and Timeline View are examples of these.
- Communication & Collaboration, Coauthoring, Reporting, Roadmap, Timesheets, and Resource Management are just a few of MSP capabilities.
- It’s a Microsoft product, so you can count on the stability and support of being a part of such a well-known corporation.
- Financial management capabilities in MS Project assist project managers in predicting budgets.
- It is available as a desktop program with a license.
- It offers templates that you may customize to help you get started quickly.
Also read: How To Use Jira For Agile Project Management?
Managerial Skills:
Project management skills are essential for productively designing, managing, and executing projects. These skills include hard and soft skills to analyze project performance, manage resources, and report progress and outcomes.
These abilities are required of project managers to successfully plan, manage, and execute big organizational projects within given schedules and budgets.